Getting the most out of your D&R Airlite broadcasting mixer console
D&R’s Airlite USB and it’s 2021 successor D&R’s Airlite MK2 are affordable, flexible and versatile digital broadcasting mixers.
The wide variety of professional features at a very reasonable price point make the Airlite a popular choice for small and medium radio stations and home studios around the globe.

The Airlite (both USB and MK2) features VoIP-connectivity, silence detection, control room monitor mute and GPIO. Thanks to USB connectivity the mixer offers two way communications with a wide range of playout software, including fader & button start and 16 cart control buttons (depending on which software you’ll use). The Airlite’s integrated soundcards add 5 USB input and output devices to your computer and your playout software.
Series contents
- Introduction: Getting the most out of your D&R Airlite broadcasting mixer console (this article).
- Connecting the D&R Airlite VoIP USB port to your computer and managing audio devices in Windows.
- Managing & renaming D&R Airlite Playback devices (channel faders) in Windows.
- Managing & renaming D&R Airlite Recording devices (audio busses) in Windows.
- Installing D&R Airlite Control for communication between software and Airlite.
- Installing and using D&R Airlite Configuration Manager to configure Airlite settings.
- Installing and using D&R Airlite Meters to monitor output levels and settings (planned for January 2022).
I bought an Airlite, now what do I do?
Setup up the Airlite might seem like a daunting task at first. I’ve created this set of tutorials to help aspiring broadcasting engineers and enthusiastic volunteers with a series of step-by-step tutorials. Upon finishing these tutorials, you’ll have a feature rich baseline installation. The concise background information provides you with the knowledge you need to customize this baseline to your own needs and preferences.
Introduction to D&R
D&R is a Dutch company founded in 1972 and named after the first initial of it’s founders first names Duco and Ronnie. Their aim was to design and manufacture mixing consoles for the music industry that were both affordable and of high quality. The last 20 years D&R is mainly involved in broadcast related products.
D&R Webstation, Airlite or Airence?
This series of articles focusses on the Airlite. Since the Airlite has a lot in common with other USB connected mixers like the Webstation and Airence, most steps can probably also be applied to those mixers, but that is just an assumption.
Disclaimer: This series is written based on my own experiences and preferences. I’m not a broadcasting professional and am not affiliated to D&R. Always check with D&R whether a mixer fulfills your needs and demands before purchasing one! The information in this series is provided “AS IS”. I make no other warranties, express or implied, and hereby disclaim all implied warranties, including any warranty of merchantability and warranty of fitness for a particular purpose.
I found the Airlite to offer the most value for money. The following table lists the key differences between these 3 popular USB mixers from D&R.
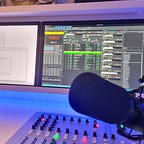
Airlite channels and connections
The Airlite contains 8 channels (also referred to as modules or faders).

All channels contain dual inputs, allowing you to connect 2 devices to each module and to switch between devices using a button above each fader.

In the following section you’ll learn about the dual inputs for each fader.
Channels 1 through 8: Line-in
Looking at the back panel of the Airlite, you’ll find 8 line-in inputs consisting of unbalanced RCA connectors, also referred to as cinch connectors. Use these to connect your CD players, MD players, pre-amped turntables and other analogue audio devices. The numbers 1–8 above the inputs, correspond to the channels/faders on the Airlite. When connecting devices, keep in mind that only channels 1 through 3 have an on-board equalizer.

Channels 1 through 3: Microphones
In addition to the line-in input, channels 1, 2 and 3 contain an XLR-connector for microphones. Phantom power is supplied to the microphone by the mixer.

Channels 4 through 7: USB players
Channels 4, 5, 6 and 7 combine the line-in with USB-in to stream audio over USB from your favorite playout software to the Airlite. These are the channels you’ll use to operate the USB-players on your computer for music, jingles and sound effects. All audio and control signals for those 4 channels are transported over 1 USB connection.

This connection consists of a USB-B connection on the Airlite. To connect this to your computer, you’ll traditionally use a ‘USB printer cable’ that has a USB-B connection on one side and a USB-A connection on the other side. I’ve found that the Airlite is finicky about the cable being used. A lot of cables simply didn’t work: no control command or audio was sent and no error was being generated. This might have something to do with the length of the cable. I could not get it to work with cables over 1.5m/5ft and with USB extension cables, while most cables shorter than 1.5m/5ft worked fine.
Modern computers come with USB-C ports. If your computer doesn’t have a USB-A port, you can use a USB-A-to-USB-C adapter or try a USB-B to USB-C cable, though I haven’t tested those yet.
Channel 8: VoIP USB
Along with line-in, channel 8 comes with a dedicated USB connection intended for VoIP communications. By creating a second connector, D&R made it possible to separate VoIP from playout should you want to.

Don’t miss out!
In the coming days and weeks I’ll publish more stories, like:
- Connecting the D&R Airlite VoIP USB port to your computer and managing audio devices in Windows.
- Managing & renaming D&R Airlite Playback devices (channel faders) in Windows.
- Managing & renaming D&R Airlite Recording devices (audio busses) in Windows.
- Installing D&R Airlite Control for communication between software & Airlite.
- Installing and using D&R Airlite Configuration Manager to configure Airlite settings.
- Using Airlite Meters to monitor the Airlite (planned for November 2021).
Would you like to stay in the loop? Then please follow me on Medium!